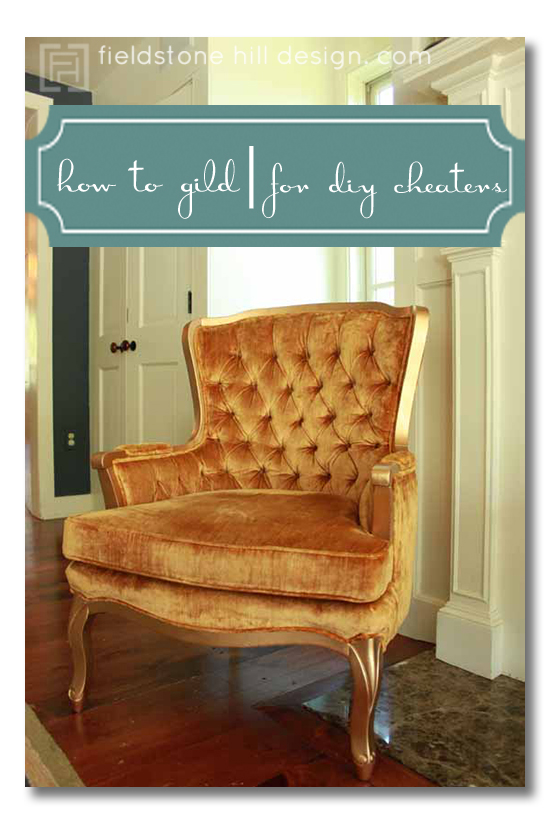
how to gild furniture {for diy cheaters}
Friday, August 17, 2012 by {darlene}

how to gild

Don’t freak out.

I am about to do a DIY post. Oh, come on. Have a little faith in my steadfast rejection of DIY projects: this one is for cheaters!

Since I am in the slow, healing process in trying to accept that I, {darlene}, am not indeed a millionaire…. And, you know, since I can’t just go out and buy whatever I want {sidenote: I would make quite an amazing millionaire. just saying}….I am attempting to embrace a few “projects” around my home that raise the level of beauty with minimal effort and minimal cash;

And, when we start talking maximum effort, then I start talking like this, “I wonder if I bribed the Nester to bring her glue gun over to my house…. or maybe, there is a home school kid who really, really wants to complete a ‘shop’ class requirement…. or maybe, I should just fork out the cash, people.”

I just want you to know what you are dealing with, friends.

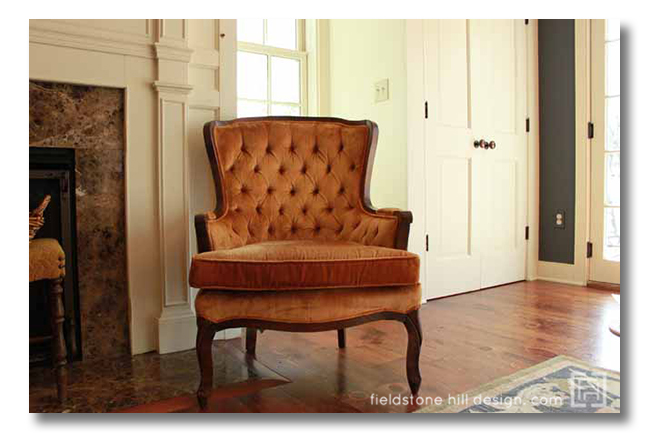
Anyway! Back to the project! I totally scored these amazing amber, velvet tufted armchairs for $59 for BOTH of them. Not a rip, stain, stench or bug among them. So, I moved around some things in the mom-mobile, and brought two of these beauties home with me:

how to gild

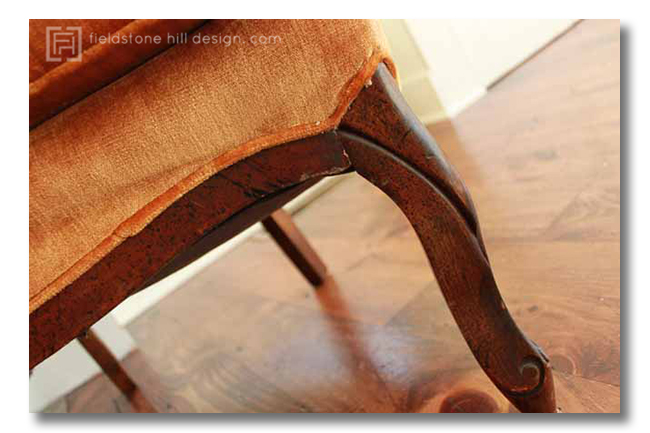
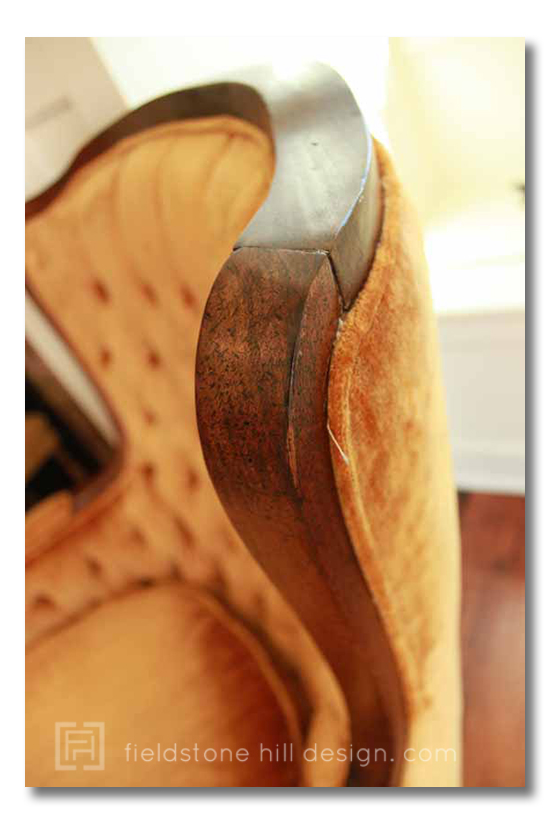
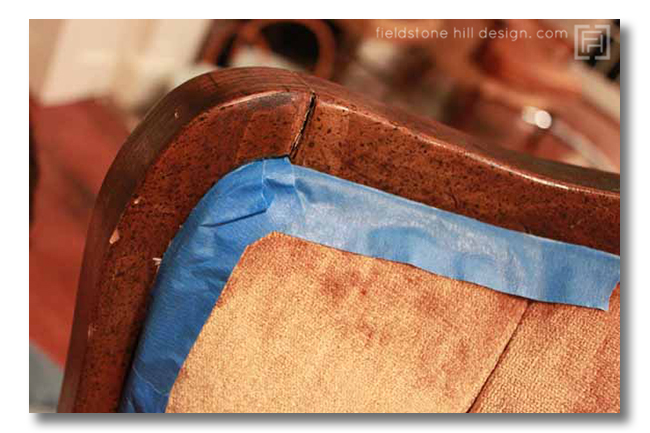
But as gorgeous as the fabric and the tufting on these chairs is, I was not a big fan of the “black dot-speckled oak early 80’s den wood” that surrounded the frame.

Exhibit A:

how to gild

Exhibit B:

how to gild

Really. Why would you purposefully speckle wood with black dots?

So, from the moment I laid eyes on these chairs, I knew that they were really born to be gilded.  I knew I would need a simple way to gild the frames of my chairs. And, what I ended up doing is perfect for the DIY cheater {or maybe I should simply say, “the wise DIY-er who believes in beautiful shortcuts”}.

Have you ever actually read about the true gilding process? My, is it gorgeous. And my, is it difficult! Prepping, creating sticky surfaces, applying leaf piece by piece… If THAT is what it takes to gild a chair, I just knew it was not going to happen on my watch. So, I went on a mission to figure out how to gild and how to get gorgeous gilding results for a fraction of the effort. And now, I am excited to share my DIY cheater skills with you!

How to Gild Furniture:

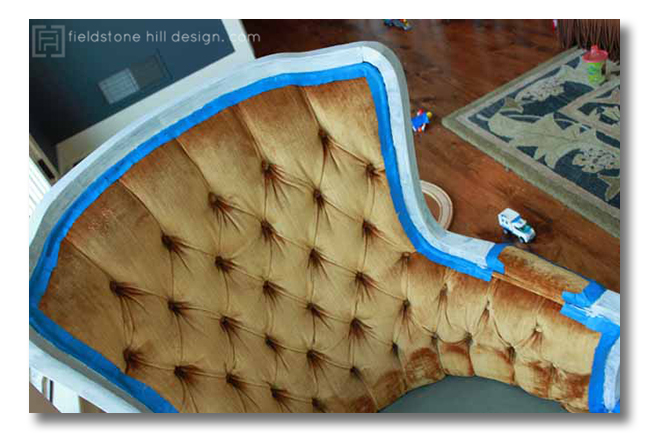
 1. Tape off any upholstry.

how to gild

2. Lightly Sand. Or at your own risk, do what I did and skip this step.

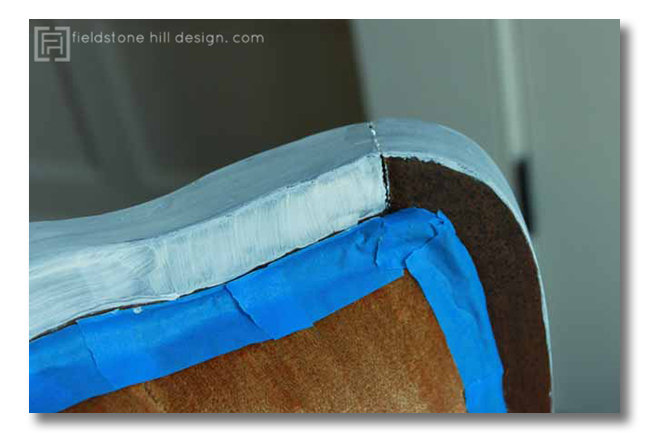
3. Use a primer, such as Bulls-eye 123 {so you don’t have to sand!}. Apply to exposed wood, being careful around the taped areas. Allow to dry.

how to gild how to gild

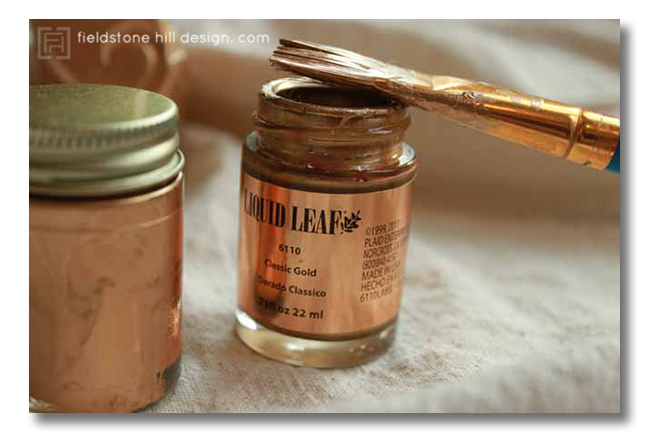
4. Apply two coats of Liquid Leaf in Classic Gold {in a well-ventilated area}. Allow to dry between coats. {I only needed one little jar per chair!}

how to gild

5. Allow to dry thoroughly, and wax the surface with SC Johnson Paste Wax.

6. When the wax is dry and has hardened, remove the tape.
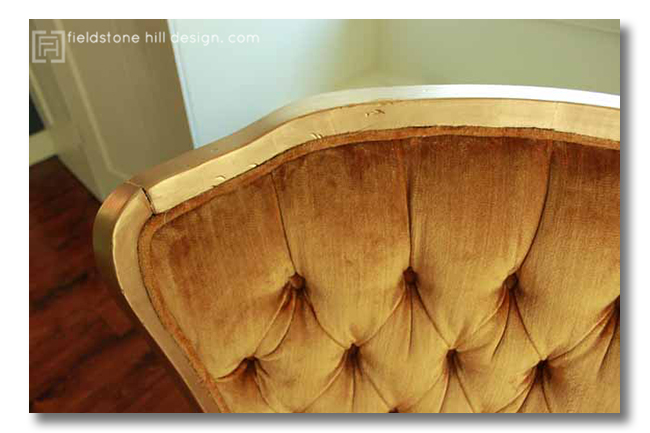
how to gild

how to gild how to gild

Basically, this was as easy as painting. The most difficult part was that the Liquid Leaf is VERY strong and I had to take regular breaks. It definitely gave me a headache, and I don’t get them easily, so be warned.

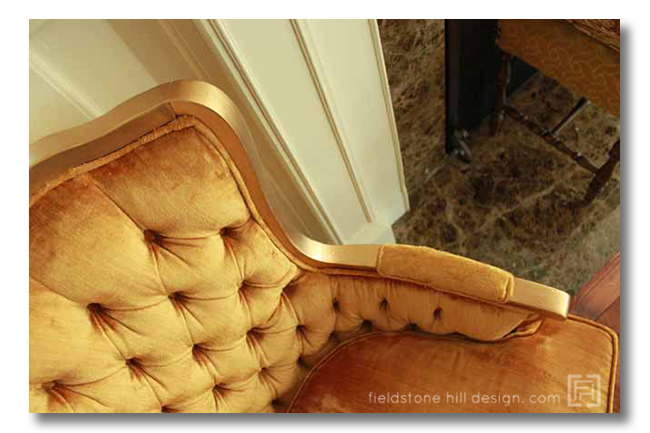
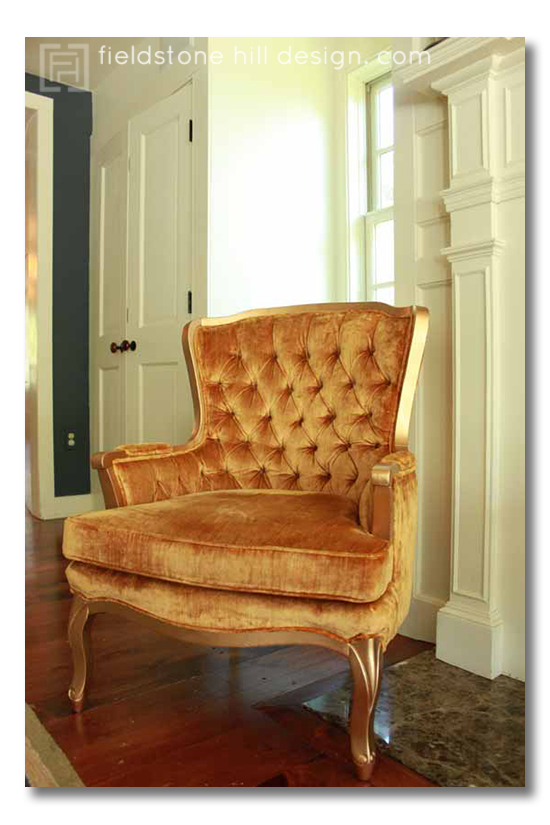
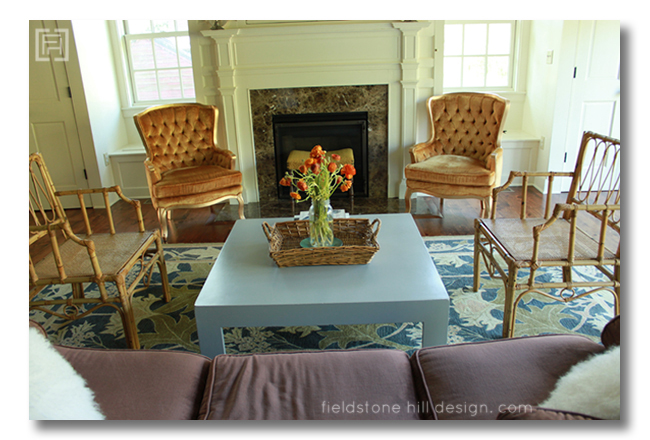
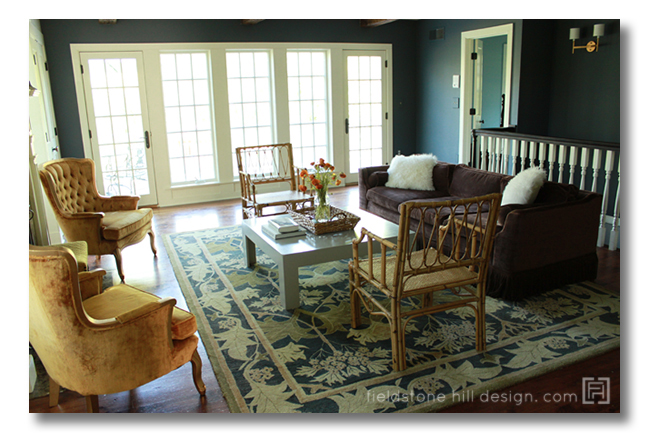
But the results! I am so happy with these chairs! And it truly was easy.

how to gild how to gild how to gild

how to gild

If you try your hand at this super easy gilding method, let me know! I can’t wait to see how it works for you!

Hmmmmm…. I wonder.  Are you dreaming up all of the things you can gild???

* * * * *

 Don’t miss a single post from Fieldstone Hill Design! You can have every post delivered directly to your inbox. It is free, and your email is never used for another purpose.

Enter your email address:

Delivered by FeedBurner

be sure to check your email, confirm your subscription, and get your freebie link!

If the subscribe box does not work click here to go to the Fieldstone Hill Design page and submit in the right sidebar.

***

This post contains affiliate links. Whenever you shop at Amazon via my links, regardless of what you purchase, you support FHD. Thank you!

***

this post is linked to Miss Mustard Seed

Labeled: ditto d.i.y., project | 37 Comments
Pin-spiration :: purple + yellow {color-wheel contrast}
Thursday, August 16, 2012 by {darlene}

Are you ready for some purple + yellow adoration?

Prepare yourself for gorgeous decorating inspiration. And all because of the power of contrasts.

I know. I know. You have heard me go on and on about the power of contrasts in decorating. But, I am not done yet. There is so much to say on this worthy design topic!

Over the next few weeks, I am going to be sharing some Pin-spiration posts on the power of color-wheel contrast. And what, you ask, is color-wheel contrast?

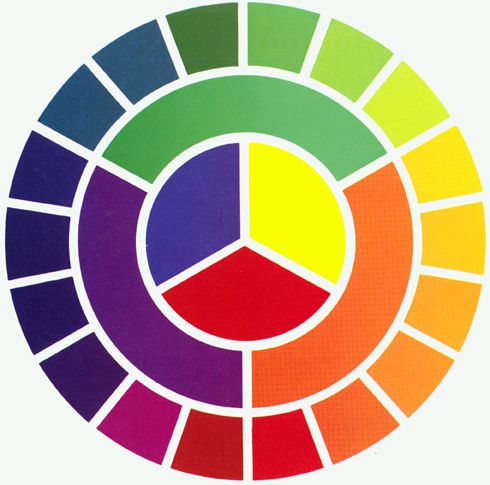
Exhibit A. Check it:

color-wheel contrast

Well, since we are talking purple + yellow today, take a look-see at purple on the color-wheel. See how it is directly opposite of the location of yellow on the color-wheel? That means that purple + yellow are opposite on the color-wheel, they are contrasting colors, and that they are technically called “complementary colors.” {for more on the color-wheel, you can catch up on an old-school art lesson here. And have fun reading up on color theory basics here.}
So, what does this mean for decorating? Simply that the colors that are contrasting also happen to be “complementary,” and pleasing to the eye.

There is simple beauty in color contrast.

But don’t take my word for it. Let your eyes do the teaching! Enjoy these amazing images that employ the use of the “complementary colors” purple + yellow:


Source: bhg.com via darlene on Pinterest


When opposite colors on the color wheel are used, it creates that high-contrast energy that keeps a room alive.

What do you think of the purple + yellow combination?

Would you use this color combination in your home?

Which of these photos inspires you most?


* * * * * * * *

 I would love to partner with you as a sponsor of FHD! For more information, visit my Contact Page.

* * * * * * * *

 Don’t miss a single post from Fieldstone Hill Design! You can have every post delivered directly to your inbox. It is free, and your email is never used for another purpose.

Enter your email address:

Delivered by FeedBurner

be sure to check your email, confirm your subscription, and get your freebie link!

If the subscribe box does not work click here to go to the Fieldstone Hill Design page and submit in the right sidebar.

This post contains affiliate links. Thank you for supporting Fieldstone Hill Design via our links!

Labeled: beautiful colors, Images Of | 8 Comments
inspired to :: have a gutsy beauty routine
Tuesday, August 14, 2012 by {darlene}

Inspired To:

gutsy beauty routine

{my favorite starlet, Yvonne Strahovski, via Allure}

Inspired To :: Have a gutsy beauty routine. Try a new hair cut. Go messy curly. Get seriously dramatic with my eye makeup. Add dramatic highlights. Watch some Chuck reruns, as usual. Practice my wheel kicking again {as inspired by Yvonne}. Try a pouty look with nude lips. Eat less sugar. Fix up my hair and makeup, and then drape myself dramatically and cross-legged on a beautiful sofa. Work at my beauty, and also rest in the beauty God gave me.

For more, hop over to my “Inspiration :: hair and makeup” Pinboard. For more beauty inspiration, check out more Decorating Yourself posts.


So. What does this picture inspire you to do……

What are you Inspired To?


* * * * *

Have you clicked over to Layla Grace ever? They have tons of inspiring and sophisticated furnishings.

* * * * *

 Don’t miss a single post from Fieldstone Hill Design! You can have every post delivered directly to your inbox. It is free, and your email is never used for another purpose.

Enter your email address:
Delivered by FeedBurner

be sure to check your email, confirm your subscription, and get your freebie link!

If the subscribe box does not work click here to go to the Fieldstone Hill Design page and submit in the right sidebar.

Labeled: decorating yourself, Inspired to | 7 Comments
ditto :: how to decorate a narrow entryway
Monday, August 13, 2012 by {darlene}

ditto monday image

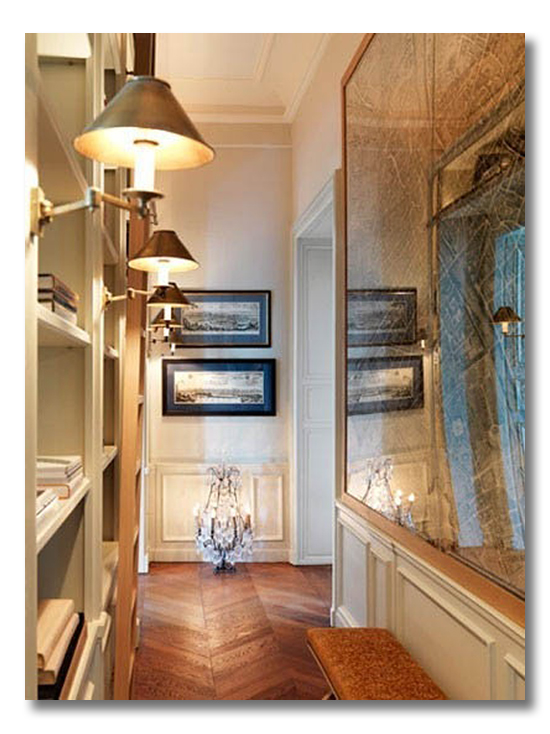
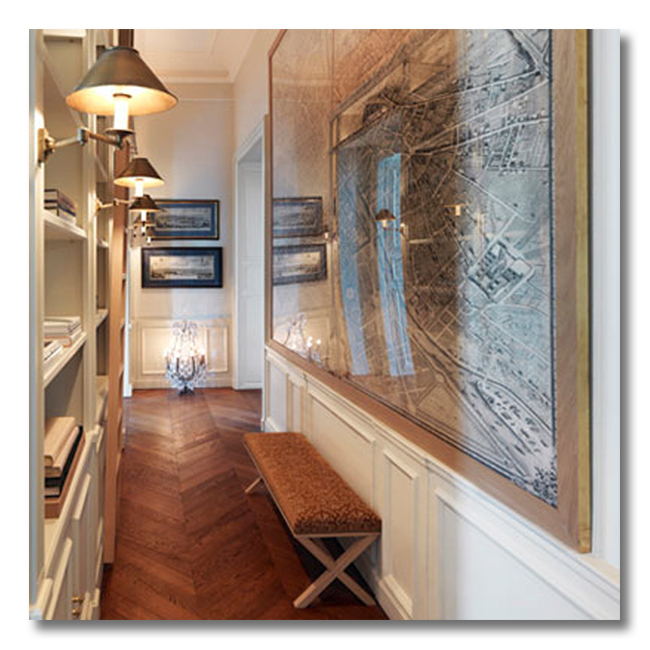
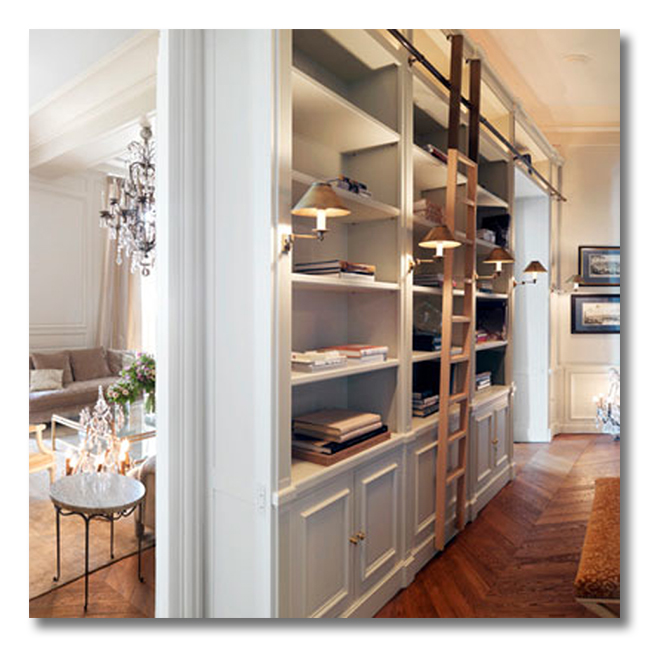
Today’s ditto is an example of interior design that really gets me excited. For some reason, I have always loved the challenge of small spaces, and of fitting every ounce of quality design that can be fit into a small space. Well, today’s narrow entryway fits that bill. This is one of the best examples of how to decorate a narrow entryway – or any narrow space, for that matter!

If you have a narrow entryway, take note. This tiny space is full of ideas!

The list below will break down for you many of the decorating concepts that are employed in this great space. As with all of our dittos, let’s study what makes this space SO AMAZING, so that we can learn how to add more beauty to OUR homes!!!

{And, as always, I look forward to hearing from you and finding out what you would ditto, too. So, be thinking!}

how to decorate a narrow entryway how to decorate a narrow entryway how to decorate a narrow entryway

{The Pavillon de Madame residence, design by Jacque Grange.}

{To see more of this amazing space, click here}


DITTO :: {WHAT I WOULD STEAL FROM THIS SPACE}:

1.    NARROW BOOKSHELVES.

Undoubtably the most genius element in this narrow entryway is the feature of the narrow bookshelves. The shelves add height, storage, usefulness, beauty, and repetition to this tiny space… all in one fell swoop! Ditto!

2.   A LARGE, LIGHT REFLECTING PIECE OF ART.

The art in this entryway helps the space appear larger in a couple of ways. One, it is very large, so it pulls the eye down the hall. Two, it reflects light because of the glass protected frame, which tricks the eye into seeing the space as larger. Three, the design, a map, has a linear pattern which also pulls the eye down the hall. Details like this really make a difference in a narrow entryway. Paying attention to the art details, and choosing art that broadens a narrow entry: Ditto.

3.  DECORATIVE PANELING.

The simple decorative paneling that covers all of the walls and the lower portion of the bookshelves is a brilliant way to add interest to an entry hall without taking up any square footage. And one more thing! Any of the horizontal lines draw they eye down the hall toward the openings at the end of the hall, and any of the vertical lines add height to the space. Bonus.

4.  CREAM WALLS.

I love creamy white walls in hallways or any other narrow spaces. I always find that it widens the space. And, of course, it is even more beautiful when the cream walls are architecturally pleasing, as these are. Cream allows the architecture to shine through.

5.   HERRINGBONE PATTERNED WOOD FLOORS.

What gorgeous floors!! But once again, the beautiful details in this space are not just there for beauty’s sake. The exquisite herringbone pattern in these hardwoods works to widen the entryway visually, as well as pull the eye down the hall at the same time. Perfection for decorating a narrow space of any kind!

6. LIGHT ALONG THE PATH.

Those library lights are amazing. And when they are switched on, they call the eye to travel all the way down the entryhall. The eye never stops moving and never feels trapped in this tiny space. Ditto!!

7. REPETITION.

Repetition is such a great decorating tool, and it has even more impact in a narrow space because repetition allows the eye to comfortably move from space to space. Here the following elements are repeated in this space: the books, the repeated shape of the bookshelf rows and columns, the library sconces, the glass-framed map art, the decorative paneling, the herringbone pattern, and the closed cabinets on the bookshelves.

8. A LONG NARROW BENCH.

The bench is both useful and has the added benefit of drawing the eye through the space, due to its narrow shape. Its narrow profile also adds a great piece of furnishing to the entryway without taking up much room.

9.  A DESTINATION.

This is the secret to decorating a small and narrow space well: There should be a destination for the eye. In this space, the eye is pulled toward two pieces of horizontal artwork, but the stronger destination is the natural sunlight that pours in from the end of the hall. Light is always the most effective destination element. The eye naturally wants to move toward it; therefore a narrow space can feel open and limitless if the eye detects an opening toward light. Personally, I think this is the best decorating element in the entire hallway. Ditto.

* * * * * * *

SO much goodness.

Love anything I did not mention? or…

WHAT WOULD YOU DITTO {STEAL} FROM THIS SPACE, 1-9? SOMETHING ELSE?

I LOVE HEARING YOUR THOUGHTS! 


* * * * * * * *

Blog Advertising is an amazingly affordable way for advertisers to purchase the gold mine of Advertising: Trusted Word-of-mouth. I would love to partner with you as a sponsor of FHD! For more information, visit my Contact Page.

* * * * * * * *

 Don’t miss a single post from Fieldstone Hill Design! You can have every post delivered directly to your inbox. It is free, and your email is never used for another purpose.

Enter your email address:

Delivered by FeedBurner

be sure to check your email, confirm your subscription, and get your freebie link!

If the subscribe box does not work click here to go to the Fieldstone Hill Design page and submit in the right sidebar.

This post contains affiliate links. Thank you for supporting Fieldstone Hill Design via our links!

Related Posts Plugin for WordPress, Blogger...

Labeled: ditto | 12 Comments