Don’t freak out.
I am about to do a DIY post. Oh, come on. Have a little faith in my steadfast rejection of DIY projects: this one is for cheaters!
Since I am in the slow, healing process in trying to accept that I, {darlene}, am not indeed a millionaire…. And, you know, since I can’t just go out and buy whatever I want {sidenote: I would make quite an amazing millionaire. just saying}….I am attempting to embrace a few “projects” around my home that raise the level of beauty with minimal effort and minimal cash;
And, when we start talking maximum effort, then I start talking like this, “I wonder if I bribed the Nester to bring her glue gun over to my house…. or maybe, there is a home school kid who really, really wants to complete a ‘shop’ class requirement…. or maybe, I should just fork out the cash, people.”
I just want you to know what you are dealing with, friends.
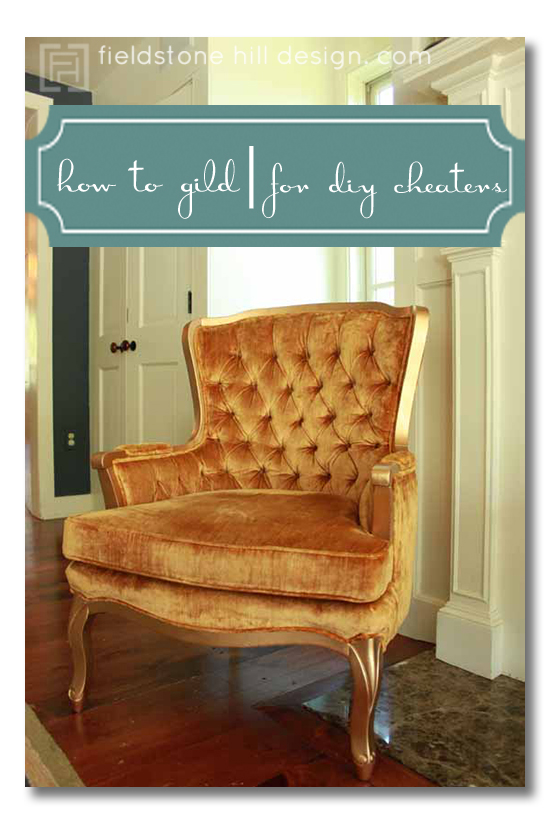
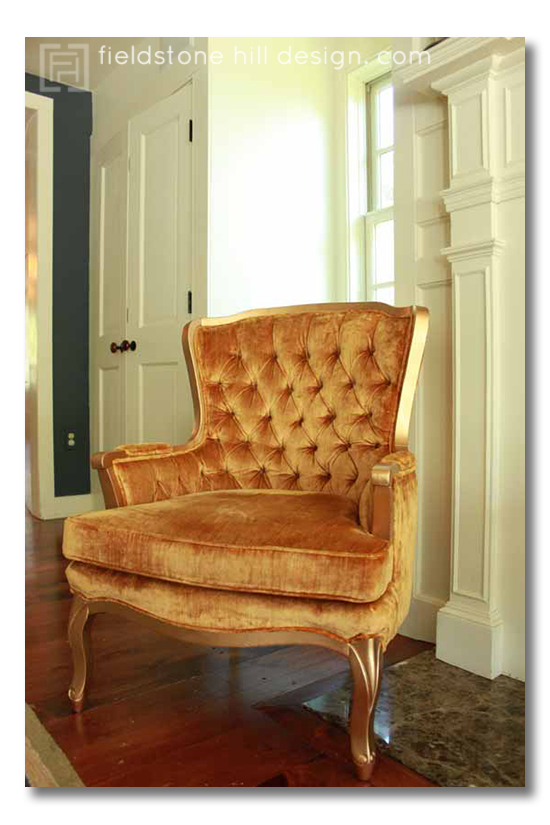
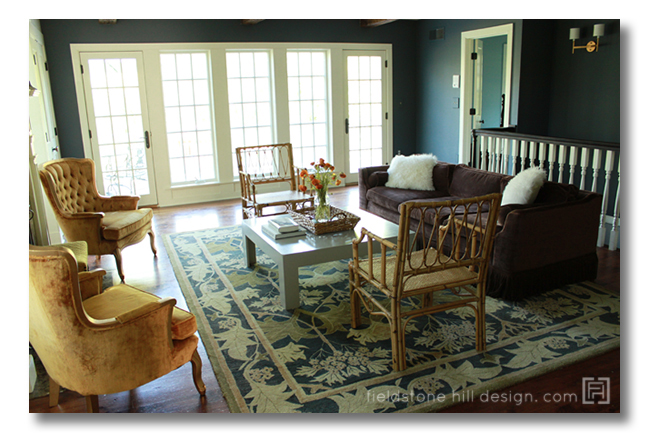
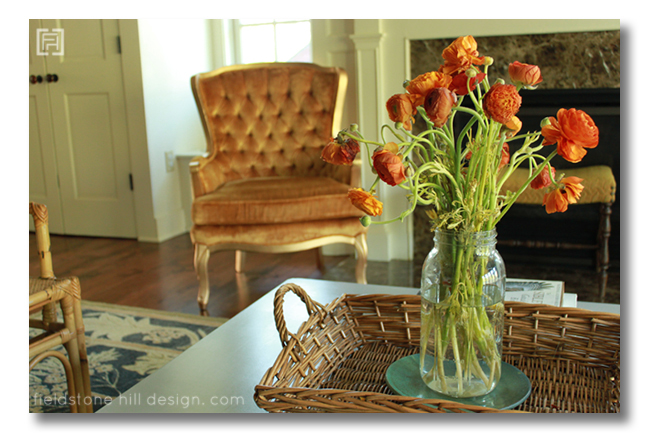
Anyway! Back to the project! I totally scored these amazing amber, velvet tufted armchairs for $59 for BOTH of them. Not a rip, stain, stench or bug among them. So, I moved around some things in the mom-mobile, and brought two of these beauties home with me:
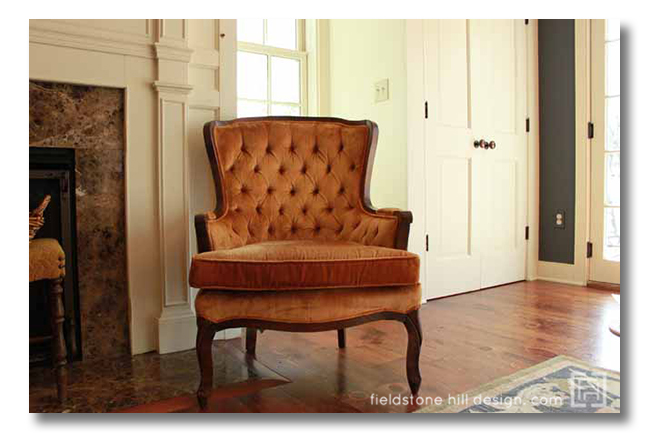
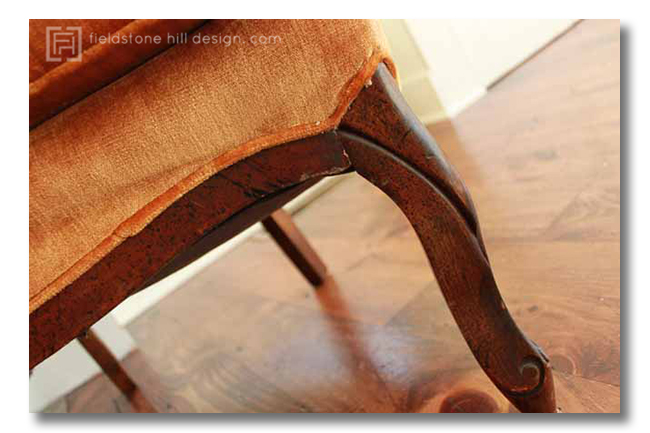
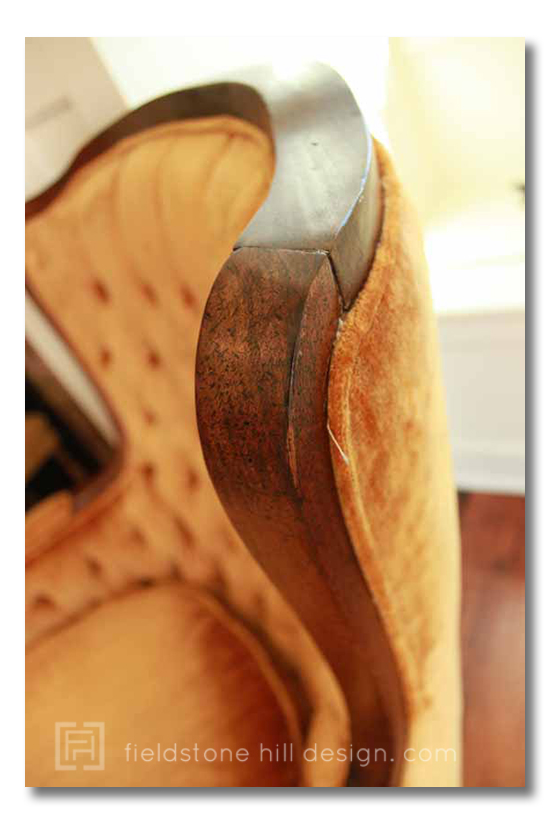
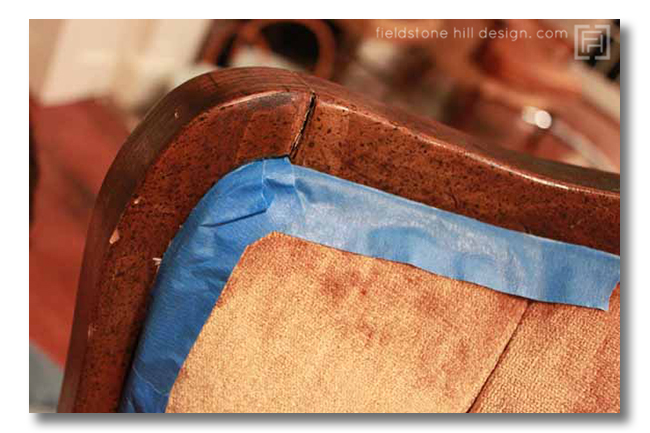
But as gorgeous as the fabric and the tufting on these chairs is, I was not a big fan of the “black dot-speckled oak early 80’s den wood” that surrounded the frame.
Exhibit A:
Exhibit B:
Really. Why would you purposefully speckle wood with black dots?
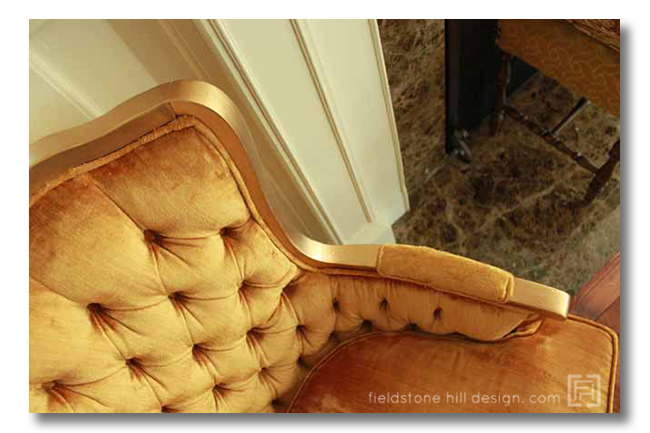
So, from the moment I laid eyes on these chairs, I knew that they were really born to be gilded. I knew I would need a simple way to gild the frames of my chairs. And, what I ended up doing is perfect for the DIY cheater {or maybe I should simply say, “the wise DIY-er who believes in beautiful shortcuts”}.
Have you ever actually read about the true gilding process? My, is it gorgeous. And my, is it difficult! Prepping, creating sticky surfaces, applying leaf piece by piece… If THAT is what it takes to gild a chair, I just knew it was not going to happen on my watch. So, I went on a mission to figure out how to gild and how to get gorgeous gilding results for a fraction of the effort. And now, I am excited to share my DIY cheater skills with you!
How to Gild Furniture:
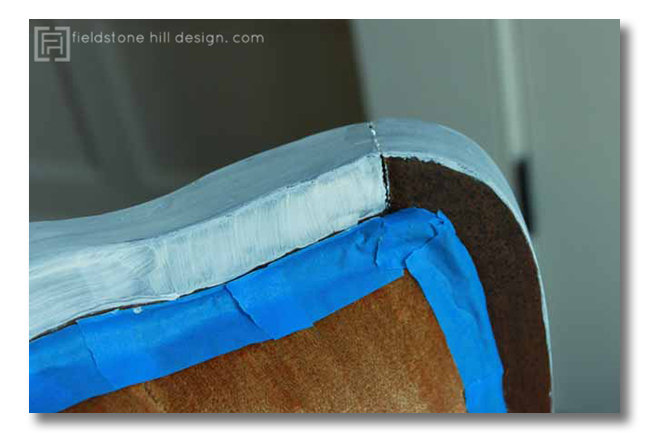
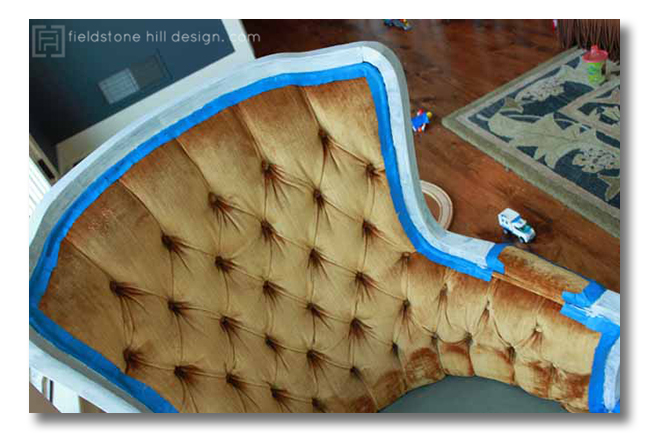
1. Tape off any upholstry.
2. Lightly Sand. Or at your own risk, do what I did and skip this step.
3. Use a primer, such as Bulls-eye 123 {so you don’t have to sand!}. Apply to exposed wood, being careful around the taped areas. Allow to dry.
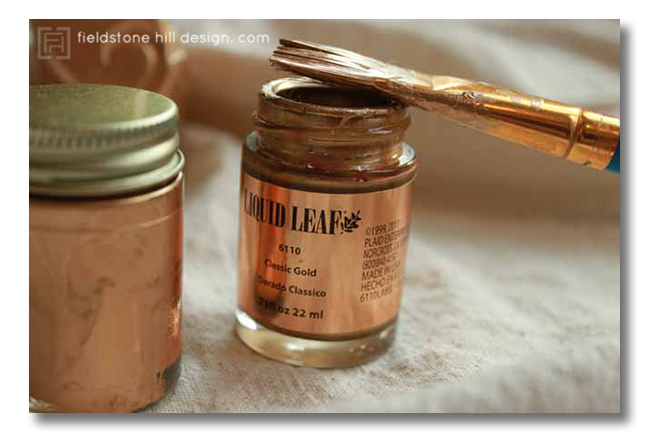
4. Apply two coats of Liquid Leaf in Classic Gold {in a well-ventilated area}. Allow to dry between coats. {I only needed one little jar per chair!}
5. Allow to dry thoroughly, and wax the surface with SC Johnson Paste Wax.
6. When the wax is dry and has hardened, remove the tape.
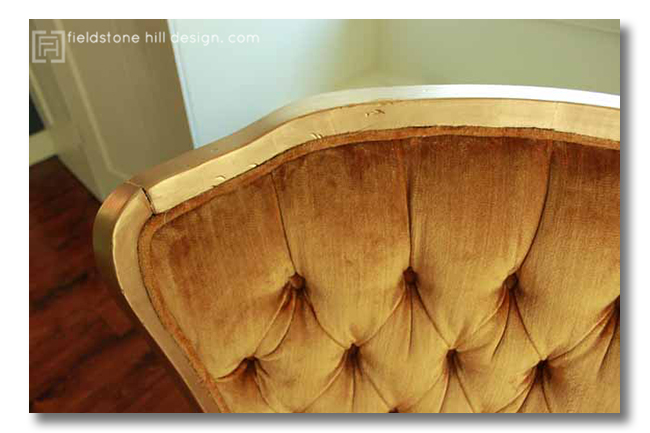
Basically, this was as easy as painting. The most difficult part was that the Liquid Leaf is VERY strong and I had to take regular breaks. It definitely gave me a headache, and I don’t get them easily, so be warned.
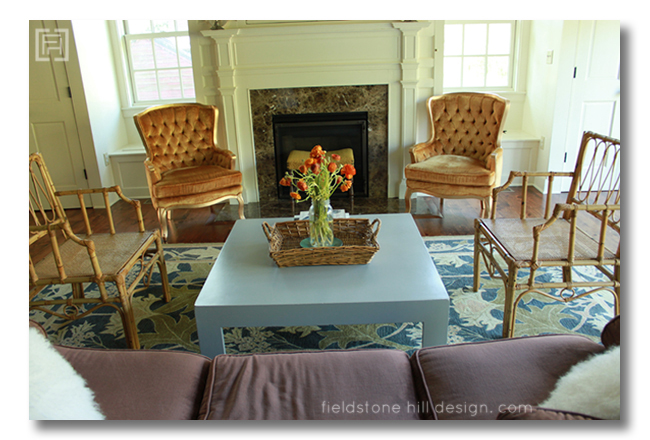
But the results! I am so happy with these chairs! And it truly was easy.
If you try your hand at this super easy gilding method, let me know! I can’t wait to see how it works for you!
Hmmmmm…. I wonder. Are you dreaming up all of the things you can gild???
* * * * *

Don’t miss a single post from Fieldstone Hill Design! You can have every post delivered directly to your inbox. It is free, and your email is never used for another purpose.
Delivered by FeedBurner
be sure to check your email, confirm your subscription, and get your freebie link!
If the subscribe box does not work click here to go to the Fieldstone Hill Design page and submit in the right sidebar.
***
This post contains affiliate links. Whenever you shop at Amazon via my links, regardless of what you purchase, you support FHD. Thank you!
***
this post is linked to Miss Mustard Seed


They look wonderful, Darlene, good for you!
thanks, alana!!
Amazing chairs and amazing results!! Love them and they look so great in your room. Now what can I gild…..
thanks, dorothy!!! let me know what you decide to gild!
Great job! Beautiful chairs too. Gilding is not really my thing and I might have been tempted to paint another color but you did a fine job with these!
thank you, cyndia!
Wow, they ooze glamor!
thanks, gyen!! oozing glamour! That is such a compliment for this girl!
Cha Ching!! You got an expensive look on the cheap for sure!!! But, you know every DIYer seems to tell the cost of products…so the liquid leaf was??
I actually ‘leafed’ some clay pots a number of years ago…they look fabulous…but it was plenty of work for just a few small pots.
Doesn’t it feel great? Do we see more DIY projects in your future?
Haha! Well, then, I am glad I will maintain my reputation at a non-DIY-er … that makes me happy!!!
But just for you 🙂 the liquid leaf was only $5.99ish or something like that. If you click on the link, you can getcha some!
WOW you are the Queen! Those chairs were a great find to begin with, but I love what they have become. FYI as a very young entrepreneurial babysitter I was told by a rich neighbor that “money marries money and that I was ‘blank’ out of luck honey” those words have embodied some aspect of my creative spirit… which in the end truly made me rich.
Thank you SO Much!!!!!
So pretty. I am usually not a fan of gold but I think it is because I know gold as the bright, shiny gold. I am loving this new gold which I guess is “gild”? It is so pretty. And yes I am thinking of what I want to gild right now, haha.
go. go. go!!! I can’t wait to see what you gild!
Love them! You crack me up- I’d be the amazing millionaire’s sidekick! I seem to intuitively find the most expensive thing in the store without trying! 🙂
okay! it’s a deal. First there was batman and robin. THEN, there was millionaire-spendy, and her sidekick champagne-taste!
YES I am dreaming up some gilding projects… LOL Really beautiful. I vote for “the wise DIY-er who believes in beautiful shortcuts.” Gotta be a good steward! : )
This is affordable & so pretty, exactly the thing I can use in lieu of yellow, too. Thanks!!
Thank you SO much Marie!!! Let me know what you gild!
Your “new” chairs look stunning in your room, and the gilded wood is such a beautiful addition. Thanks for the tip!
Thank you, Paula!
I have done a bit of gilding. Once I saw what a difference it made on a single piece, I started canvasing the house, singing, whose NExt? I tried, I really did, to contain my enthusiasm but soon the spokes on lampshades turned gold, a frame on a mirror glinted at the sun, I crowned a picture frame which, no longer matte black, strutted her stuff. My husband caught wind of this, literally, the odor drew him in. First response, are we done yet? so beware, that gold just spreads across the house!
I just knew that you and I were gilded sisters!
They are just lovely Darlene! And Im so proud of you for doing a little DIY. I can’t believe you paid $59 for both! Thats awesome!
Thank you SO much Amanda!
Oh these turned out so nice! You’re right – I’m looking around to see what I can gild.
gorgeous, girl! absolutely gorgeous! I love it! I am so behind, and we have some catching up to do. I had a dream about you the other night. we were in a theater together. so weird. I’ll fill ya in soon. let’s catch up! LOVE.
Gorgeous! Another great product to get this look is rub’n buff, which I used on a similar chair. SO many great ideas to make past their prime items sing again, I’m thinking! Janell
[…] from Fieldstone Hill, shows us a simple gilding project {for DIY […]
Those two chairs are amazing! $59 for both? That is highway robbery! Or maybe it really was robbery! Amazing. And I love the gold gild. I must get to the 2nd hand furniture consignment stores today to search out some similar chairs.
Thanks for sharing! I got two free chairs from Craigslist that need a new paint job and reupholstering. Think I maybe trying this on the frame.
Look at you go DIY chickeata! 🙂 Nice job and you better be careful…..diy might just be in your blood. heheheheh
Ah, the speckled wood look. I’m happy you gave those gorgeous peach chairs the life they deserve.
And, your coffee table is white, right? Because in some of the pics it looks like robin’s egg…which looks really pretty! Or is it blue?
The coffee table is museum piece, by Benjamin Moore. It is a greigy gray that is so pale, it almost looks white. I love its complexity!
Hello Darlene!
Thanks a lot for your great and inspiring posts! Amazing stuff…
Now, I know this is a very old post, but I have to do a gilding project and my researching drove me right to your page! I love your approach and I’m about to follow it.
I have a few questions though, about the wax you applied after the gilding. The part of the armchair that one rests his/her hands accept a lot of friction, human fat, moisture etc. How long the wax will last? Is it enough to protect the gilded area? How come you didn’t use a varnish instead?
Thanks a lot.
Keep up the good work!!!!
Allow the wax to harden very well after applying. It has excelling endurance and stands up well.
[…] How To Gild {for DIY cheaters} […]
How to build a pallet accent wall in an afternoon. Includes tips on safe pallets to use, and building wire pathways for mounting a TV.
fhd press:
FHD’s popular posts
sponsors I love
peruse
shop like it’s your job
FHD in blogland
categories
31 Days of Favorite Spaces A room I love about me Affordable Designer Rooms beautiful colors beautiful thoughts Bebe bebe bebe nursery before and after BHG blogland built-in of the Week client spaces contrast decorating yourself defining your style design boards design in progress design question ditto ditto d.i.y. ditto-worthy designers en masse farmhouse simplicity five faves for a song from my files here at Fieldstone Hill hiding the uglies high-gloss glamour Home tour Images Of inspiration Inspired to lessons in design living with beauty Living with Beauty: Beauty Tips and Tricks Living with Beauty: Wellness Living with Beauty: Whole Food Eating Living with Beauty: Within Master Designer mixed metals must have objects organizing overcome decorating paralysis project project kitchen project library project nursery punch color renovation rituals room by room sponsor style notebook traditions trends Uncategorized vision
Archives
Theme by Design by Kendall